
Checklist for First-Time Home Buyers : Important things to Consider
24th July 2024

24th July 2024
Buying your first home is very exciting. After going to what feels like endless inspections, when you finally do find that house that ticks all boxes, it’s easy to overlook some flaws, but it’s important to remember that those small flaws can later turn out to be a costly fix.
It is easy to be emotionally invested in the whole process, you might have fallen in love with the newly remodeled bathroom, the stylish kitchen backsplash, or the charming patio. However, it’s important to keep in mind that purchasing a house is a big life decision, and you need to make sure everything is in order before you sign the contract.
Whether you’ve been in the market for a while or just started looking, here are a few points to consider. These are based on my firsthand experience, so hopefully you can avoid the same mistakes.
When I bought my house, which now feels like ages ago, it was a newly renovated two-bedroom, one-bath house with an open-plan living and kitchen areas. It was the perfect size for me and within my budget. Buying that house was a dream come true for me.
While I love my house and don’t regret purchasing it all those years ago, I realize now that I could have negotiated better and could have been more mindful of the subtle signs of poor-quality renovations that had taken place right before the sale.
So, here’s what I would have done differently:
I initially thought hiring a building inspector was a waste of money. The house looked like it had been newly renovated. The rendering looked like it was done not long ago and a fresh coat of paint can be very deceiving.
Building inspections typically cost between $200 and $500, depending on the property size and location. The building Inspectors typically look for structural damage in accessible areas like walls, roofs, floors, and garages. These findings can influence your decision on whether you want to proceed with the purchase or not or even can be used to bring down the purchase price depending on the issues identified.
If I had hired a building inspector they would have been able to identify the hidden structural issues. Later we saw that the rendering was done to cover up some major cracks on the wall. The house was slightly tilted as one side was lower than the other which meant eventually it would require costly underpinning. The title also created gutter issues as the water was flowing in the opposite direction to what it should have been.
Always have a qualified conveyancer or solicitor review the section 32 of the contract. This document includes details about any building works or alterations that had taken place. You will be able to identify whether those modifications were council-approved. Unapproved changes can have an impact on the resale value and lead to legal issues.
For example, discovering unapproved extensions or decking could prevent future headaches. Unapproved structures can significantly reduce the property’s value when it’s time for you to sell.
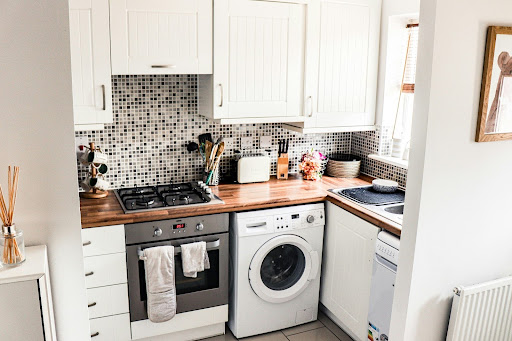
Don’t hesitate to test the oven, stove, and range hood during inspections. I felt awkward doing that and later discovered faulty appliances after moving in. The range hood, for example, was not only missing a bulb but also had faulty wiring and had to be replaced entirely.
To avoid such surprises, use a final inspection checklist to ensure everything is in working order before settlement. If not the real estate agent can be notified so it can be fixed before the settlement.
Also be sure to check for broken windows, loose tiles, and functional appliances. I missed the cracked bathroom window glass and the loose tiles in the kitchen backsplash. These could have been either fixed or taken off the purchase price if I had done a thorough check.
It is very important to inspect the ceilings and walls for drip marks or stains, which can indicate water damage. Fixing water damages can be very costly, I ignored similar signs and ended up with a $25,000 repair bill for roof and mold damage, luckily insurance covered most of the costs but I couldn’t move in until it was all fixed which took 2 months.
In my case, one day after a heavy downpour, I noticed a few drops coming down the bathroom tiles. Initially, I didn’t take it seriously, but later discovered a massive water bubble between the ceiling and the wall. When the insurers came to inspect the damage it was obvious that the roof had been leaking for a while, leading to extensive black mold growth that required complete removal and treatment. The entire bathroom had to be redone.
Minor details like tile grout and skirting reveal the quality of renovations. Mismatched or poorly finished workmanship shows that it was a DIY project which is very common these days after all the renovation shows.
Some sections had skirting while others didn’t, and the skitting was coming off and they all varied in size and color. After moving in I also noticed a large section of the wall was uneven, they had applied a fresh coat of paint to hide the damage but this also should have been picked up during the final inspection.

As nice as it is to have a backyard full of trees it is important to understand if it is one that is manageable or requires regular maintenance which can be time consuming and costly. Is there a front yard and a backyard that needs regular grass cutting?
Also be mindful of large trees near the house that may block gutters and cause damage, requiring regular cleanups.
My neighbor had big trees all around and during autumn the leaves would fall on my red gravel making it nearly impossible to rake the leaves. In the end I spent over $2000 laying turf and putting pavers to avoid the hassle.
Large trees around also mean tree roots that could damage the pipes that can also be quite costly.

During the final inspection make sure all windows have keys and they all open and close properly. Also check if the blinds are functional. These are easy to overlook but can be costly to fix later.
I discovered on my first day that the roller blinds were jammed and the ball chain snapped as I tried to close it. Replacing the blinds added unnecessary expense to the moving process.
It is important to research the neighborhood and ask the real estate agent about the sellers’ reasons for selling the property. This can reveal potential issues with neighbors or future developments. A good way to get a feel of the neighborhood is to drive around the area at different times of the day. This will give you an idea about the noise level or school zones that may create traffic.
Consult council records for any planned construction projects in the area. Unforeseen developments can disrupt your peace and affect your property’s value.
Only a few weeks after moving in, a notice appeared about the construction of three large townhouses across the street directly in front of my house, blocking my view and introducing noise for 18 months during the construction period.
Obtaining home and content insurance before purchasing a house is important to protect both the property and content that includes blinds. It is usually a lender requirement and will give you a piece of mind during the home buying the process.